Simply Sensational 9-Patch Stars

April 17th, 2012

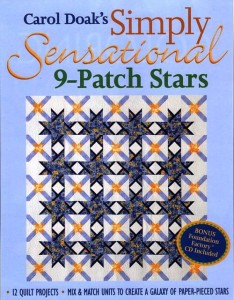
I am often asked the what would be a good book to purchase in order to learn the beginning steps for paper foundation piecing. Although all of my books contain instructions on how to paper piece, Simply Sensational 9-Patch Stars is a super place to start. I have even put together a Starter Kit in my web store that includes this book, a package of foundation paper and the Add-A-Quarter ruler. With these three items, a new paper piecer is on their way.

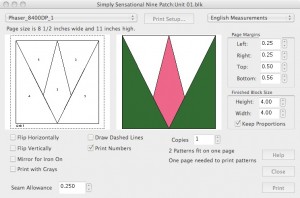
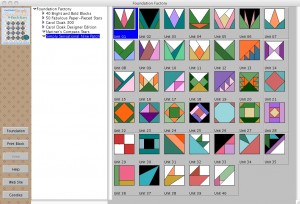
The blocks in the book are comprised of point units, center units and corner units. Mix and matching these units make up the 9-Patch Stars and more. The book comes with the Foundation Factory program, so it is just a matter of selecting the unit you would like to print, the size of the unit and how many and hitting “print” to create your foundations.

The units themselves are very simple with few pieces so they are quick and easy to create. Even though they are quick and easy to create, the star blocks they create are striking.

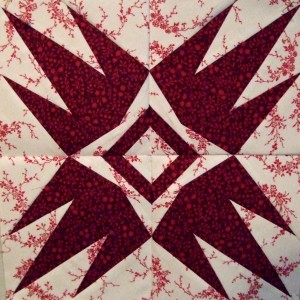
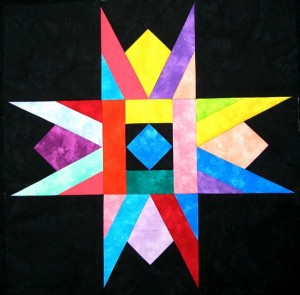
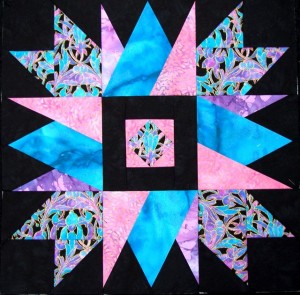
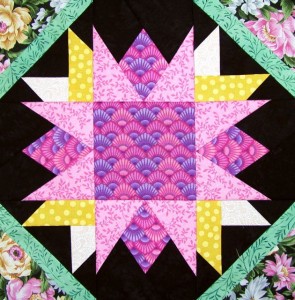
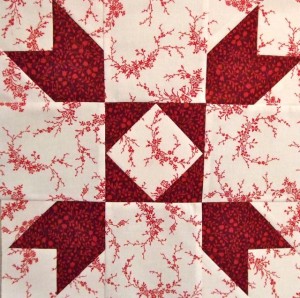
Above are three of the Simply Sensational 9-Patch Stars representing Alaska, Georgia and Kentucky. There are actually 50 of these blocks, each representing one of the US States.

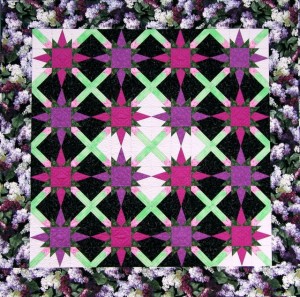
There are 9 quilts in the book, each made up from the units in the book. The quilt above is called Star Crossed and is made up using just two different foundations–a point unit and a corner unit.

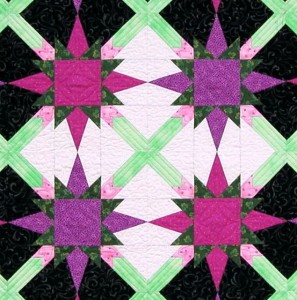
The corner units create a wonderful lattice connecting the star blocks.

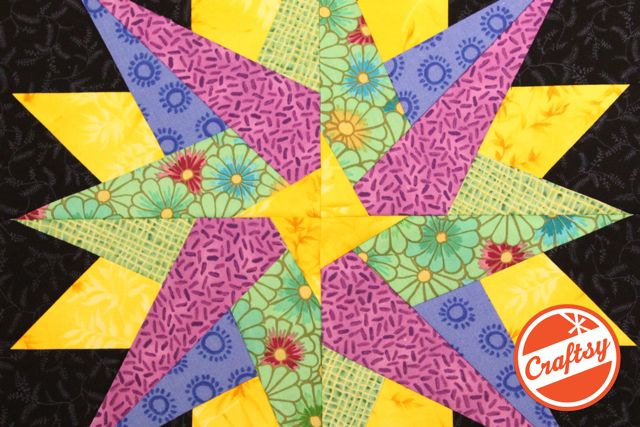
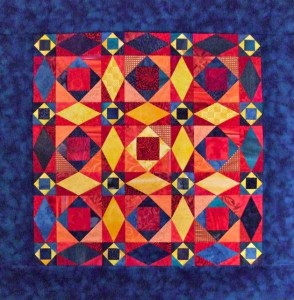
Ok, so just in case you think the possibility of 2500 star combinations and endless quilt options is too confining, consider this. You can take those units and enlarge them, reduce them and distort them offering even more options. The Storm at Sea pattern above was made using two simple center units.

A book that teaches you to paper piece, keeps you in blocks, and offers amazing creative options is a super way to start to paper piece and continue to paper piece for years to come.

All the best,

Carol


Spring Fling Challenge

April 11th, 2012

It must be the weather and the explosion of spring colors beginning to show themselves, that has caused me to get into the swing of Spring. So, this morning I designed this darling 3″ nosegay block offering the opportunity to feature lots of Spring colors. I uploaded the “Spring Fling” foundations and cutting directions in the Free Patterns Section of my web page.

The Challenge is:

1. Make the block

2. Upload a picture on my Facebook page http://www.facebook.com/CarolDoakQuilts by April 18. That gives you a week to make a block that should take you about 15 minutes.

3. The prize….From all those that upload their picture by April 18, on April 19th I will draw a random winner. And the winner will win 4 yards of spring colored fabrics from my out-of-print fabric collections.

You are welcome to share the fun with your friends…the more the merrier!

Have fun,

Carol

Paper Piecing the Carol Doak Way (Easy Way)

April 4th, 2012

Recently I have run across several tutorials on the web explaining how to paper piece. Athough they are well meaning, gosh, they often make it more difficult than it is. So, I was always taught, don’t complain, make it better. Therefore, I decided to create my only online tutorial and here it is. Enjoy, Carol

Supplies:

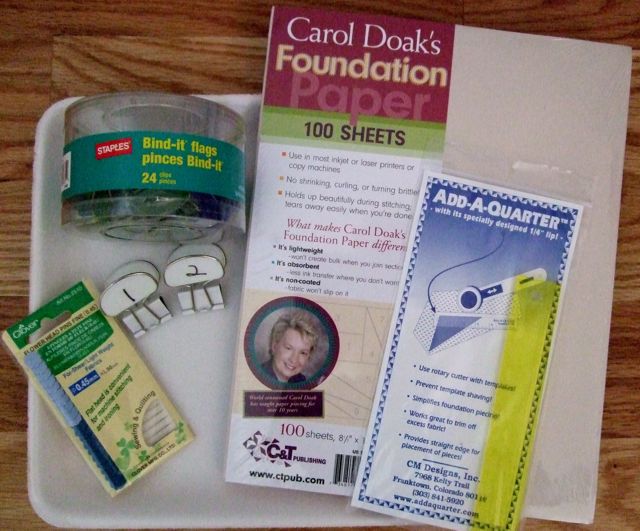
Carol Doak Foundation Paper-Perfect for paper piecing because it is easy to use, will not loosen the stitches when removed, eases when joining blocks and easy to remove.

Flat Headed Pins

Add-A-Quarter Ruler attached to a postcard with the 1/4″ edge over the edge of the postcard. Place the ruler on the right side for right-handed cutting and left side for left-handed cutting.

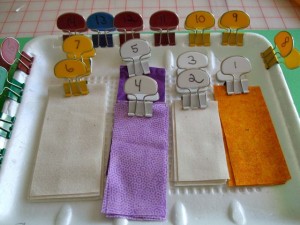
Binder Flag Clips labeled #1-7 to number your fabric pieces

Styrofoam meat/fruit tray to transport your pre-cut fabric pieces

Size 90/14 needle

Iron set on cotton setting, no steam.

Rotary Cutter and rotary mat
Foundations

1. Select your foundation and print on Carol Doak Foundation Paper. I am going to use “Introduction to Paper Piecing” offered in the Free Patterns section of my web page. Please note that for the purpose of showing how this is done, I will use vellum in the photos below so you can see through the foundation.

2. Print one of page 1 for your cutting list on copy paper.

3. Print two of page 2 on Carol Doak Foundation paper to make four foundations. I will demonstrate making one block.
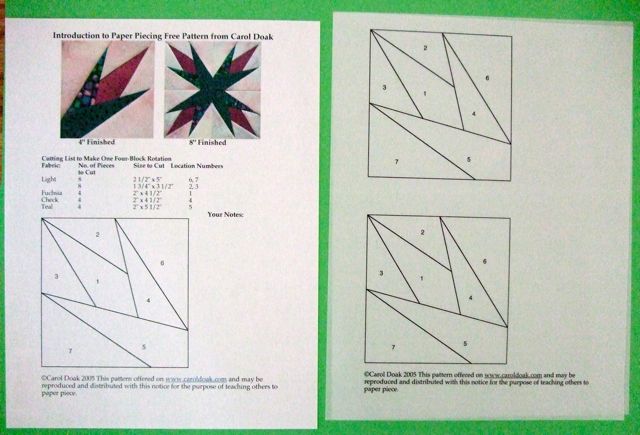
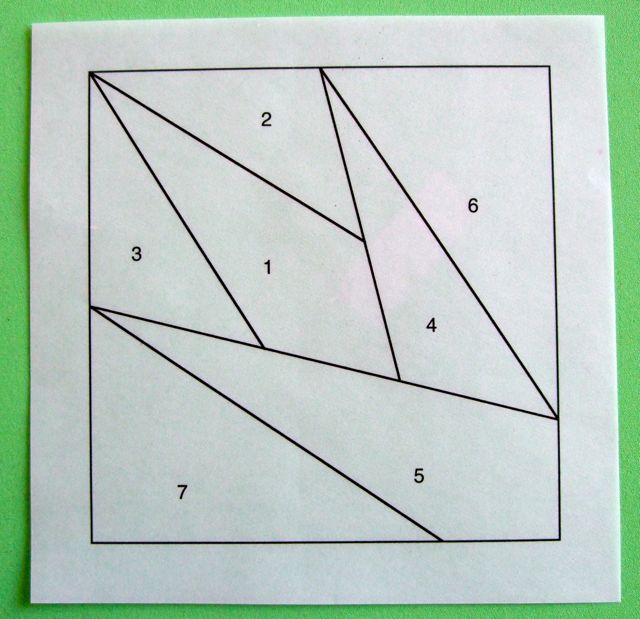
4. Using your rotary cutter and ruler, trim the foundations 1/2″ from the outside solid line.
 Fabrics

1. Using the cutting list provided on page 1, cut and label your fabric pieces. It is easiest to cut a strip the smaller measurement and then cut the lengths. For instance, the first item on the list is 8 pieces, each 2 1/2″ x 5″ and they are used for location number 6 and 7.

Cut a strip 2 1/2″ wide and then cut the 8 pieces each 5″ long from the strip.

2. Clip your #6 and #7 Binder Flag to this group of fabric.
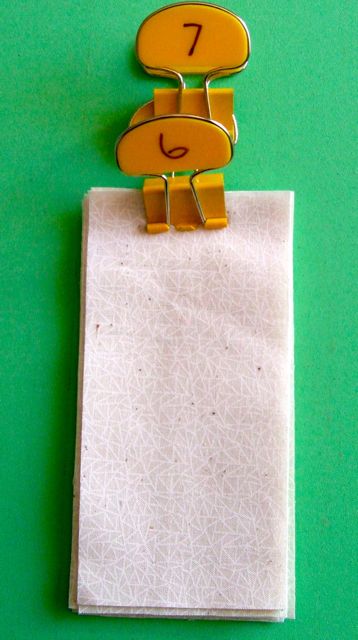
3. Cut the remaining pieces in the list in the same way and place them on a Styrofoam meat/fruit tray.
 Sewing Machine

Set up your sewing machine with a neutral color thread, a 90/14 needle and 18 to 20 stitches to the inch. That is about a 1.5 on a sewing machine that has a range of 0-5.

 Step-By-Step Paper Piecing — Trim, Sew, Press

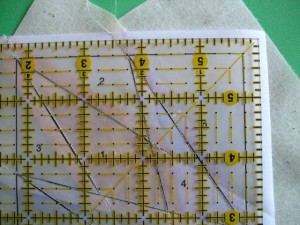
1. Select the #1 fabric piece and position it RIGHT SIDE UP on the BLANK side of the paper over the #1 area. Be sure that it covers the area completely with at least 1/4″ all around the #1 area.
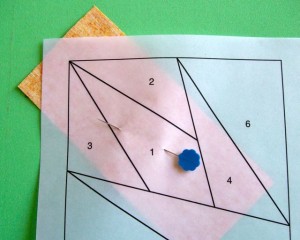
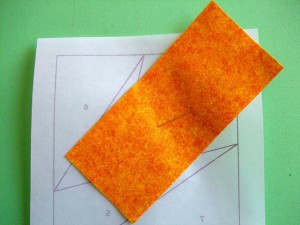
        

2. Place the postcard on the line between #1 and #2. Fold the paper over the edge of the postcard exposing the excess fabric beyond the #1 seam line.
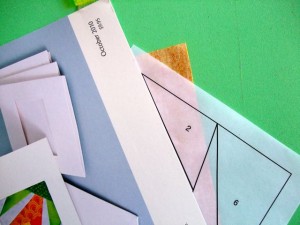
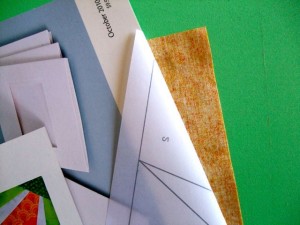
       

3. Place the Add-A-Quarter ruler along the edge of the fold and trim away the excess fabric.
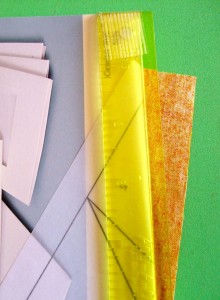
     

4. Place the #2 fabric right side up over the area it needs to fill to ball park placement, then right side together with the previous piece along the just trimmed line.
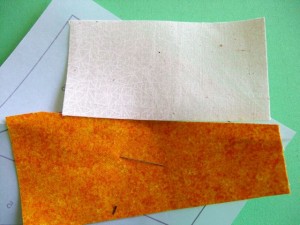
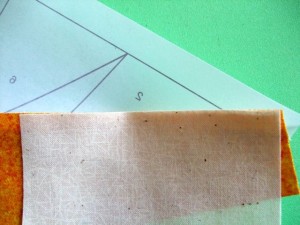
     

5. Confirm that the ends of the #2 piece will cover the #2 area.

6. Pin in place.

7. Place with the lined side up under the presser foot and sew on the line, extending the stitches 1/2″ on each end. Remove and press the #2 piece open.
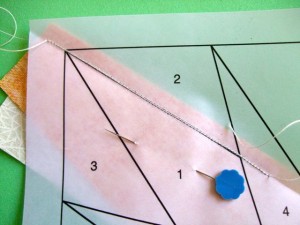
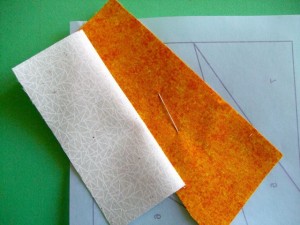
    

8. Now, using the #3 line, follow the same sequence of trimming, sewing  and pressing as described in steps 2 through 7. Remember when you extended the stitching on each end of the line? Well, when you place the postcard along the #3 line, you will need to pull away the stitching from the paper at the pointed end to fold over the card. That is fine. However, the fabric pieces will still be stitched in the seam allowance area and that cuts down on bulk in these areas.
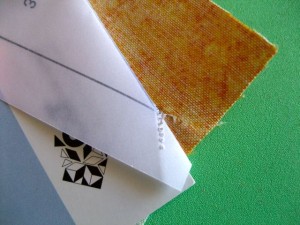
9. Once the #7 piece has been sewn the block is trimmed 1/4″ from the outside sewing line.
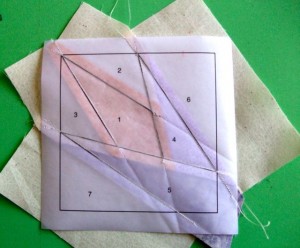
  

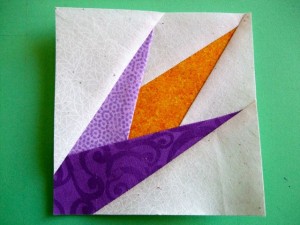
And here is your awesome block all finished with those perfect points. To make the 8″ block featuring a 4-block rotation, simply make three more blocks assembly-line fashion and join them.
For lots of tips and tricks about paper foundation piecing (measuring your fabric pieces, joining blocks, speed methods etc.), I would suggest any of my paper piecing books and/or DVD, Carol Doak Teaches You to Paper Piece.

I hope these instructions will encourage you to give paper piecing a go and if you are already paper piecing, I hope they add to your enjoyment of this fun method.

Carol

©Carol Doak 2012
What Happens on a Quilting Cruise Stays on the Quilting Cruise….Not!- Part 1

March 13th, 2012

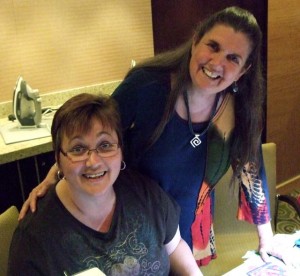
I have just returned from an absolutely fabulous cruise aboard the amazing Royal Caribbean Alure Ship. There I was, with lots of old quilting friends and new quilting friends for a fabulous 7 days aboard the largest ship in the world. Here Debby Luttrell and I are having just met up in the Promenade getting ready to go ashore in Nassau. There are 5,000 passengers on this ship. Where are they?

It was a beautiful day in port. The sun was shinning and the little shops were open and ready for business.

My friend Rhonda found the perfect colorful little frock. Doesn’t she look happy!

You really don’t appreciate just how big this ship is until you get off in port. Man, you could put one of the other ships inside this ship. Everyone walking back to the ship after a beautiful day.

Back aboard ship we all went about the task of making new friends.

Once the ship sailed out of port, the fun continued in the Casino….doesn’t everyone look happy?

Now it was time to head off to our private dining room with the rest of the group to have diner.

Something new on this trip was the option to table hop each night so we could have dinner with different quilters.

After dinner, time to play with friends…so many options and so little time…shows, plays, music and the list went on and on. Here a group of us met up on the Boardwalk. Over 5,000 passengers and we kept running into our friends.
Oooooh, I am not done….move on to read Part 2!

What Happens on a Quilting Cruise Stays on the Quilting Cruise….Not!- Part 2

March 13th, 2012

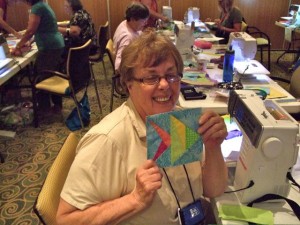
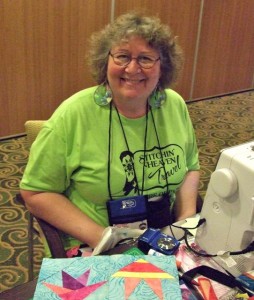
After the ship left Nassau, it was time to start our first day of three classes. Here a happy student is showing off her first fish from the row I designed for the cruise.

It was fun having students from the Carol Doak Yahoo Group aboard. Here is Cathy hiding in the bushes in Central Park.

Gail Garber taught the top row of the quilt and Eileen Sullivan taught the bottom row of the quilt.

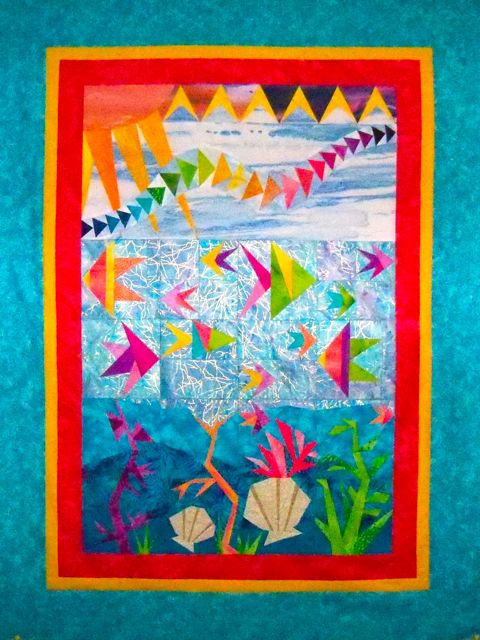
This is a picture of the project for the cruise. Debby made it really easy by kitting the project and supplying Bernina Sewing Machines. Two cruisers actually won this quilt and the one Debby had made.

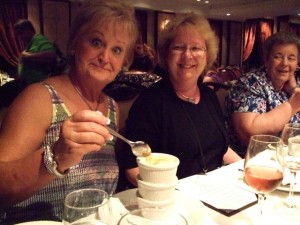
Time for dinner again and the special dessert that Debby really likes ….umm…is she really eating three of them??

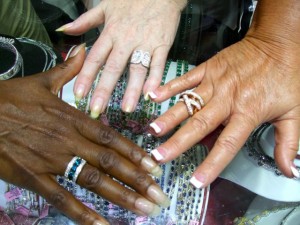
Don’t they say “diamonds are a girl’s best friend”? Well, I introduced Debby and Rhonda to my favorite jewelry store in St Thomas, Imperial Jewelers and we got into just a bit of trouble…..

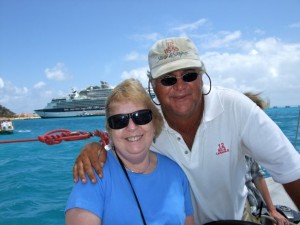
Speaking of trouble, next port is St Maarten. Gail, Rhonda and I signed up for the America’s Cup races. it was a beautiful day and we learned to sail.

The captain said he could not have won the first leg of the race without the help he got from Gail, Rhonda and I.

Gail is smiling because we haven’t fallen overboard yet.

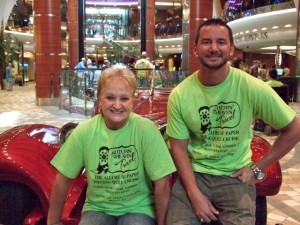
It was time to head back to the ship and play with our friends in our group. We could always find them when they wore our special Stitchin Heaven Travel T-Shirt. Here Debby and Clay (her son in charge of travel) are hanging out on a gorgeous car in the Promenade.

Two more days of fun classes. The students stayed in each of three rooms and the teachers moved to the next room each day. I see fish swimming there.

Besides all the amazing shows going on each evening, there are also special events that occur. This was 70’s night on the Promenade and the “Village People” showed up to sing YMCA!…Heh, I know that song.

Good bye wonderful ship and sail happy until we meet again,

Carol

Cruise Hawaii in September 2013 is my next cruise. If you want to read all about it, click here.  This cruise is limited to 40 quilters and you can sign on and pay a bit at a time. If you have any specific questions about it, just ask Debby or Clay.

Amazing Dubai and the International Quilt Show of Dubai- Part Two.

February 13th, 2012

Maureen and Mary are two quilters from the local Dubai Quilters Guild. They took me off to visit the Ibn Battuto Mall after class. This mall is amazing. It is named after a 14th century explorer and each section of the mall is done in the style of the countries he explored.

Check out this ceiling and the lights.

How about an elephant in your mall?

Here is the ceiling in the China section.

The tile work in this section was mind blowing…

Back at the ranch, the next day I taught the Perfect Points class. Everyone did super and did love their perfect points.

The gorgeous waterfall at the Dubai Mall.

Outside the mall we were treated to the world’s tallest structure is the 829.84 m (2723 ft) tall Burj Khalifa in Dubai. It is so tall, you can only get a picture of the base or part of the top.

The amazing Dubai Fountains put on a spectacular water show to music every 20 minutes. The water is shot in the air as high as a 50 story building. We ate dinner and watched several shows that I would describe as fun to very moving.

Next we are off to Part Three, the International Quilt Show of Dubai…

Amazing Dubai and the International Quilt Show of Dubai- Part One.

February 13th, 2012

I left home about a week ago to travel half way around the world to visit Dubai in the United Arab Emirates to teach at the International Quilt Show of Dubai. I was both excited and apprehensive about traveling to such a distant place. Dubai is know for its amazing buildings and the view from my hotel window showed a glimpse of what I would see.

I stayed at the Dhow Palace Hotel and even the furniture lived up to its palace name.

The carvings and decorations in the hotel were pretty amazing. Here is a picture of the night stand in my room.

My first outing in Dubai was to the fabric souks. Here, the walkways are lined with little shops where a variety of fabrics are displayed both inside and outside. It is a real feast for your eyes.

Next we headed to the “creek” where we boarded these boats called Abras that would take us across. Everyone just boarded and sat in the middle.

This boat is called a Dhow. They are very heavily loaded with goods that they bring into Dubai. Some are decoratively painted and others look like it is time for dry dock and repairs.

On the other side of the creek are the spice souks selling their raw spices. It was really interesting to see such a variety and what they looked like in the whole form.

Dubai is called the City of Gold and visiting the Gold souks is a must. The shops are on both sides and filled with 18, 21 and 24 karat gold pieces. I have never seen so much gold in one place.

Barbara Weeks (the other international teacher from the UK) and are are laughing about the world`s largest gold ring on display behind us in the window. Ummm…wonder if that would fit?

However, I was there to teach so the next day I began with the Paper Piecing Tricks of the Trade class. It was a great group of students consisting of expats from around the world and quilters from the local areas.

I am off to the mall in Part – Two..

Amazing Dubai and the International Quilt Show of Dubai- Part Three.

February 13th, 2012

The next day, Barbara Weeks and I judged the show held at the Festival City Mall. I was very impressed with the quality and variety of the work offered for exhibition and judging. Unfortunately, I do not have a list of the title to the pieces and their makers name, so I will share the images here as a virtual quilt show. The subject matters were varied and ranged from traditional, contemporary and whimsical. Some pieces reflected the images of the area such as the piece above that was awarded best of show.

The detail here was amazing. It won First Place in the long arm quilted category.

This was another ribbon winner. Gorgeous intricate thread painting was used. Because this show was hung in the mall, it attracted a great deal of interest from the people in the mall. While we were there, a gentlemen from Iran came up and asked about the quilts. He was touched by one quilt in particular that was set in an Iranian town that he grew up in. The theme of the show was reflections and the artists statement about that quilt described how when they behaved badly as a child, their mother would send them to the river to see the reflection of the person they have become. It struck me that worldwide, quilters put their hearts and souls in their quilts.

This was a ribbon winner in the Contemporary category.

That evening we enjoyed a Gala Dinner, awarding of the prizes and a very entertaining Turkish Dancer.

The next day was my final day of classes teaching the Sunrise Mariner`s Compass. Here is a happy student who has completed half of her block.

Here are two more happy students…

And we even had several finished tops by the end of the class. It was a great day had by all.

In fact, the trip was everything I could have hoped for and more. I loved teaching the classes and judging the show and getting to know the quilters from Dubai and the surrounding areas and countries. Thank you Dubai for your warm hospitality.

All the best,

Carol

Tis the Season of Love

February 2nd, 2012

It is that time of the year when Valentine’s Day is just around the corner and many of our thoughts turn to the ones we love. They may be our partners, our husbands and wives, our children and grandchildren. The patchwork heart can come in many forms. The little wall quilt above is simply three hearts and the LOVE block from my newest book, 50 Little Paper-Pieced Blocks.


Valentine’s Day falls second only to Mother’s Day as the most important day for sending cards. An estimated 143 million cards are sent/given for Valentine’s Day. The card above was created using one of the Carol Doak Keepsake Cards and one of the quick and easy heart blocks from the 50 Little Paper-Pieced Blocks book. I used some multicolor thread and a decorative stitch on my sewing machine to embellish the card.


Stamps are another way to embellish and create messages on your cards. The “Bless Your Heart” stamp is perfect when using a patchwork card. I purchased it online at Rubber Stamp Tapesty.


This is the cover of 50 Little Paper-Pieced Blocks and it is available in my web store or possibly at your local quilt shop. You could call ahead and see if they have it in stock.


Here is the packaging for the Carol Doak’s Keepsake Frame Cards. These cards and envelopes are made of wonderful paper that has the feel of handmade paper. There are four cards and envelopes in the package. The package retails for $9.95 making each card less than $2.50. Unfortunately, C & T Publishing is out of stock of these cards and therefore, I am also out of stock. I am hoping I will have a supply by the end of the month. Call ahead and see if your local quilt shop still has a supply. UPDATE: Just heard that Checkers Quilt Distributors still has a supply of cards. Ask your shop to order them if they are out.  These cards are a super deal as far as the cost of greeting cards these days. I did a bit of research about greeting cards and found the following not so surprising statement about cards. Giving a greeting card creates a lasting impression and emotional bond between sender and receiver. In a national survey for the Greeting Card Association, nearly one-third of respondents said they keep the special cards they receive “forever.”

Another way to express love is through a little mini quilt. This Scrap Hearts Miniature quilt was first showcased in my out of print Easy Paper-Pieced Miniature Quilts book. Miniature quilts are so easy to make using paper foundation piecing methods. This one features little heart blocks featuring the look of scrap red fabrics. You would use the same methods as traditional paper piecing, but substitute the Add-An-Eighth ruler for the Add-A-Quarter ruler. Use cotton batting when machine quilting to give the quilt a flat look. When your loved one receives this quilt, they are going to think you are amazing. Don’t tell them that minis are actually so easy because the fabric pieces are huge in relation to the area they are going fill.

Since the minis in this out-of-print book were so popular, I decided to reproduce them in pattern format including all the patterns to make each quilt pre-printed on Carol Doak Foundation Paper.

Then one day I had one of those light bulb moments when I realized I could place the images for the pattern on a CD so they could be printed right from your computer. Each CD contains four mini patterns. The Miniatures Set Two above contains the Scrap Hearts, the Scrap Stars (another very popular pattern!), Tree of Life Medallion and Jeweled Fans.

The book, patterns, CDs and Add-An-Eighth ruler are all available  in my web store.

Until next time,

Carol


It Has Been Awhile….

February 1st, 2012

50 Little Paper-Pieced Blocks

My it has been some time since I have posted a blog but I am determined to get back to posting frequently this year. So much has happened since last year and keeping up with it all was not possible. That meant somethings were put on the back burner and I am afraid regular blogging was one of them.

Let’s see….

I wrote two books, one of which is the 50 Little Paper-Pieced Blocks shown above. I designed the blocks in this book to go with the Carol Doak Keepsake Cards.

The other book is in production…I can’t tell you about it yet, but as soon as I can, I will be sharing lots here about it. It is paper piecing but an entirely new and exciting avenue for this wonderful method.

I moved. Not an easy task moving the studio, office and house…We moved to a smaller house on a lovely lake. Living on a lake has been a life-long dream and I am loving it. Last summer, when I would get tired and warm working on the quilts and blocks for the new book, I would just jump in my bathing suit and go off or a swim.

We having been doing lots of updating to the house. One update included teaching guys who were putting in the new walk, how to create a 9-Patch star.

Our first grandson arrived on the scene….my oh my…he is perfect..

A couple of years ago I made the decision to cut back severely on all the travel/teaching I had been doing for years. I just wasn’t bouncing back from the rigors of my trips and I wanted to spend more time with my family.

I still plan to stay involved in the quilt world, write the books,  create new designs and travel on a very limited basis. This year I have four trips planned. I have already taken the first trip to teach for a week at the Road to California. It was a super trip and reminded me how much I do love what I do.

I am heading off next to Dubai to teach at the Dubai International Quilt show. I know this trip will be exciting and a wonderful experience teaching there. I am sure I will have lots to share when I return.

Until next time…may all your points be perfect.

All the best,

Carol